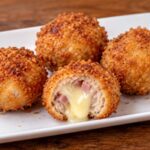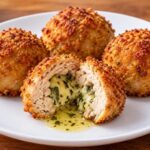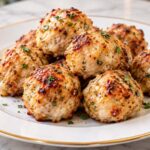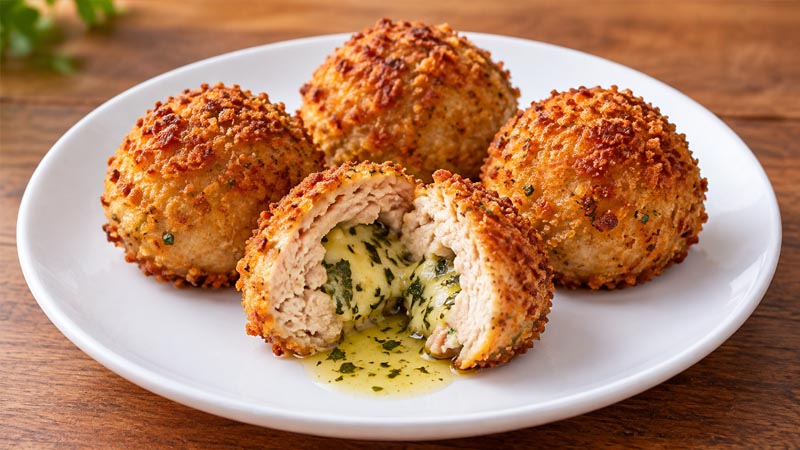
Air fryer chicken Kiev balls are crispy, golden appetizers made with ground chicken breast, a rich garlic-parsley butter center, and a crunchy panko coating.
Each bite combines tender, seasoned chicken with warm, melted herb butter, creating a delicious snack or starter for family meals and gatherings.
This recipe makes 12 chicken balls and takes approximately 55 minutes, including preparation, chilling, and cooking.
Freezing the butter filling before assembling and briefly chilling the breaded chicken helps keep the butter sealed inside while the exterior turns golden in the air fryer.
Recipe Overview
- Prep Time: 15 minutes
- Chilling Time: 30 minutes
- Cook Time: 10 minutes
- Total Time: 55 minutes
- Yield: 12 chicken balls
- Cooking Temperature: 400°F (200°C)
- Cooking Method: Air frying
Cooking the chicken balls in two batches allows sufficient room for hot air to circulate around each piece. This helps the panko coating crisp evenly without overcrowding the basket.
Ingredients
For the Garlic-Parsley Butter
- 1/2 cup unsalted butter, softened
- 2 tablespoons fresh flat-leaf parsley, finely chopped
- 2 garlic cloves, crushed
For the Chicken Balls
- 1 (16-ounce) package ground chicken breast
For the Crispy Coating
- 2 large eggs
- 1 cup panko breadcrumbs
- 1 teaspoon paprika
- 1 teaspoon salt
- 1/2 teaspoon ground black pepper
- Cooking spray, as needed
Instructions
Step 1: Prepare the Garlic Butter
Place the softened butter in a small mixing bowl. Add the chopped parsley and crushed garlic, then stir until the ingredients are evenly distributed throughout the butter.
Divide the mixture into 12 equal portions and arrange them on a baking sheet. Transfer the tray to the freezer for approximately 20 minutes, or until the butter portions are firm enough to handle without losing their shape.
Step 2: Shape the Chicken Balls
Divide the ground chicken into 12 equal portions. Roll each portion gently between your hands to form a ball, then press a deep indentation into the center.
Place one frozen garlic butter portion inside each indentation. Carefully bring the chicken around the filling, sealing all the edges so that no butter is exposed. Smooth the surface of each ball and check that the filling is completely enclosed.
Step 3: Coat the Chicken Balls
Crack the eggs into a shallow bowl and beat them until smooth. In a separate bowl, mix the panko breadcrumbs with the paprika, salt, and black pepper.
Dip each chicken ball into the beaten egg, allowing any excess to drip away. Roll it through the seasoned breadcrumbs until completely covered.
For a thicker, crunchier crust, dip the coated ball into the egg again and roll it in the breadcrumb mixture a second time. Arrange the finished balls on a baking sheet and place them in the freezer for 10 minutes to firm up the coating.
Step 4: Preheat the Air Fryer
Preheat the air fryer to 400°F (200°C). If your appliance requires a different preheating procedure, follow its manufacturer’s instructions.
Lightly coat the air fryer basket with cooking spray if needed to help prevent sticking.
Step 5: Air Fry the Chicken Kiev Balls
Arrange six breaded chicken balls in the air fryer basket, leaving space between each one. Spray their surfaces lightly with cooking spray to encourage even browning.
Air fry for 5 minutes, then carefully turn each ball over using tongs. Spray the other side lightly and continue cooking for another 5 minutes, until the coating is golden and the chicken is thoroughly cooked.
Check the internal temperature of the chicken with a food thermometer. Ground chicken should reach 165°F (74°C) at the center. If necessary, continue cooking in short intervals until this temperature is reached.
Transfer the cooked chicken balls to a serving plate and repeat the process with the remaining six pieces. Allow them to rest briefly before serving, taking care when biting into them because the garlic butter inside will be hot.
Tips for Crispy Chicken Kiev Balls
- Freeze the butter thoroughly: Firm butter is easier to enclose in the chicken and less likely to escape during cooking. Keep the portions in the freezer until you are ready to assemble the balls.
- Seal the filling carefully: Make sure there are no cracks or thin spots in the chicken surrounding the butter. Any exposed filling can leak as it melts.
- Use a double coating: The second layer of egg and panko creates a thicker crust that helps protect the filling and gives the chicken balls a satisfying crunch.
- Chill before air frying: A short freezing period helps the breading adhere and the assembled balls retain their shape when transferred to the basket.
- Avoid overcrowding: Cook in batches, keeping the chicken balls separated so hot air can circulate around them.
- Spray the coating lightly: A little cooking spray helps the breadcrumbs brown. Avoid excessive spray, which can make the coating greasy.
- Check doneness with a thermometer: Cooking times may vary between air fryer models and the size of the chicken balls. Verify that the center reaches 165°F (74°C) before serving.
Serving Suggestions
Serve the chicken Kiev balls while they are hot and the garlic butter is still melted. They work well as party appetizers, game-day snacks, or part of a casual dinner.
Pair them with a fresh green salad, roasted vegetables, or crispy potato wedges for a more substantial meal. A simple lemon wedge can add a bright contrast to the buttery filling, while a light dipping sauce can complement the crunchy coating.
Nutrition Facts
The estimated nutritional values per chicken ball are:
| Nutrient | Amount |
|---|---|
| Calories | 154 |
| Total Fat | 9g |
| Saturated Fat | 5g |
| Cholesterol | 78mg |
| Sodium | 280mg |
| Total Carbohydrates | 7g |
| Dietary Fiber | 0g |
| Total Sugars | 0g |
| Protein | 13g |
| Vitamin C | 2mg |
| Calcium | 14mg |
| Iron | 1mg |
| Potassium | 140mg |
These values are estimates and may vary with the brands and exact quantities of ingredients used.
Final Thoughts
Air fryer chicken Kiev balls bring together a crisp panko exterior, juicy ground chicken, and a flavorful garlic-herb butter center in a convenient appetizer-sized portion.
With careful sealing, a short chilling period, and proper air frying, you can prepare a batch that is golden on the outside and rich and buttery inside.
Serve them fresh from the air fryer for a satisfying addition to your next meal or gathering.