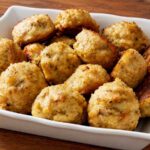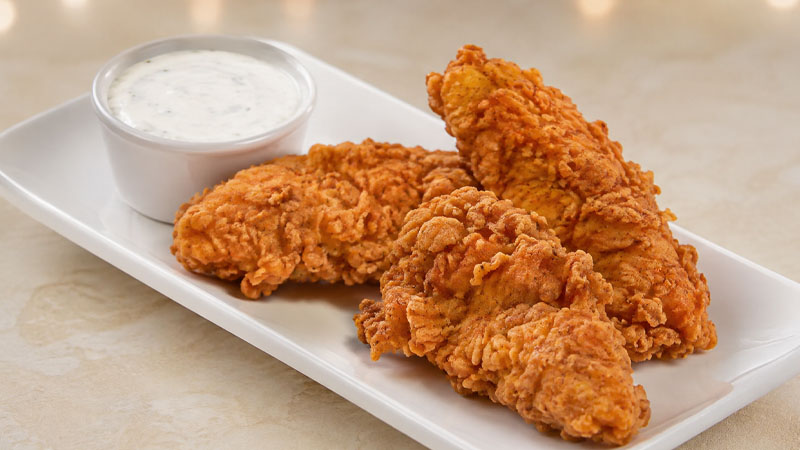
Delight in the art of crafting perfectly crispy, golden-brown chicken strips right in your own kitchen. By soaking tender cuts of chicken in a rich dairy marinade, the meat retains its natural juices while absorbing a savory blend of spices.
Coated in a seasoned flour crust and fried to absolute perfection, this dish balances a satisfying exterior crunch with a remarkably tender and moist interior.
Recipe Overview
- Prep Time: 10 minutes
- Cook Time: 20 minutes
- Resting Time: 20 minutes
- Total Time: 50 minutes
- Yields: 4 servings
Ingredients Needed
- Chicken: 1.5 pounds of fresh chicken tenders (or boneless skinless breasts sliced lengthwise into strips)
- Marinade: 2 cups buttermilk
- Dry Coating: 1.5 cups all-purpose flour
- Spice Blend:
- 1 tablespoon table salt
- 1 tablespoon garlic salt
- 2 teaspoons ground mustard powder
- 1 teaspoon sweet or smoked paprika
- 1 teaspoon freshly ground black pepper
- Cooking Medium: 2 cups peanut oil (or any high-smoke-point vegetable oil)
- Finishing Touch: Additional salt and black pepper to taste
Step-by-Step Cooking Instructions
1. Marinate the Chicken
Place your chicken strips into a large glass, ceramic, or stainless steel mixing bowl. Pour the buttermilk completely over the poultry, ensuring every piece is fully submerged.
Cover the bowl securely and refrigerate for 20 to 30 minutes to let the dairy gently tenderize the meat.
2. Prepare the Seasoned Flour
While the chicken rests in the refrigerator, whisk together the all-purpose flour, table salt, garlic salt, mustard powder, paprika, and ground black pepper in a wide, shallow dish or clean paper bag until thoroughly combined and uniform in color.
3. Heat the Cooking Oil
Pour the peanut oil into a deep fryer or a heavy-bottomed Dutch oven/saucepan. Attach a deep-fry thermometer and heat the oil steadily until it reaches 375°F (190°C). Maintaining a consistent temperature is key to achieving a non-greasy, crispy crust.
4. Coat and Dredge
Remove a few chicken strips at a time from the buttermilk, allowing excess liquid to drip off gently. The chicken should remain damp so the flour adheres properly.
Drop the damp strips into the seasoned flour mixture, tossing or shaking gently until completely and evenly coated.
5. Fry to Golden Perfection
Carefully lower the coated chicken strips into the hot oil in manageable batches (about 6 pieces at a time) to prevent the oil temperature from dropping drastically.
Fry them for 6 to 8 minutes, turning occasionally, until the coating is deeply golden brown and crispy, and the internal meat is fully cooked through.
6. Drain and Season
Transfer the cooked strips using a slotted spoon or metal tongs onto a wire rack or a plate lined with paper towels to drain excess oil.
Immediately sprinkle with a pinch of fresh salt and black pepper while the surface is still hot. Repeat the process for the remaining batches.
Essential Chef Tips
Spice It Up
For an extra kick of heat, whisk a tablespoon of your favorite hot sauce or cayenne pepper directly into the cold buttermilk before adding the chicken.
Oil Selection
Peanut oil is preferred for its high smoke point and neutral flavor, but canola oil, sunflower oil, or corn oil serve as great alternatives.
Double Dip Variation
If you prefer an extra-thick and ultra-crunchy crust, dip the floured chicken back into the buttermilk, then through the flour mixture a second time before frying.
Nutrition Facts (Per Serving)
| Nutrient | Amount | % Daily Value |
| Calories | 518 kcal | — |
| Total Carbohydrate | 43 g | 16% |
| Dietary Fiber | 2 g | 6% |
| Total Sugars | 6 g | — |
| Protein | 45 g | 90% |
| Total Fat | 17 g | 22% |
| Saturated Fat | 3 g | 17% |
| Cholesterol | 102 mg | 34% |
| Sodium | 3318 mg | 144% |
| Calcium | 176 mg | 14% |
| Iron | 4 mg | 22% |
| Potassium | 554 mg | 12% |
Note: Nutritional values are estimated based on standard preparation metrics. The total amount of flour and buttermilk absorbed or oil retained will vary depending on exact cooking duration and technique.