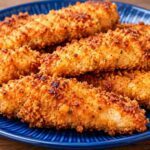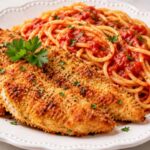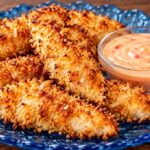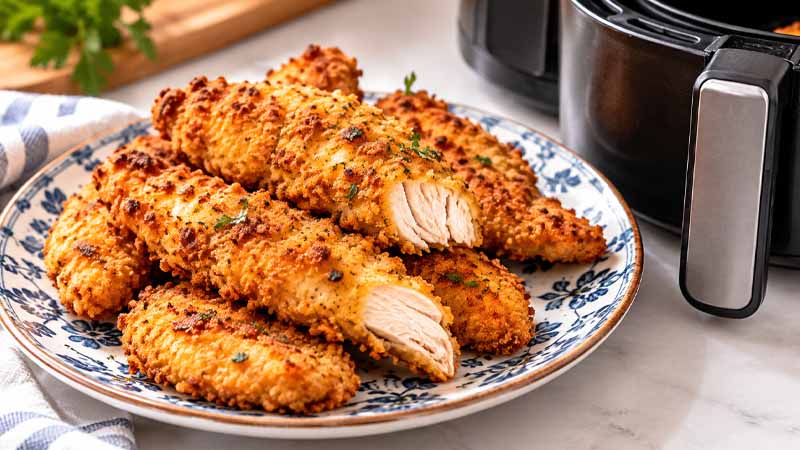
These homemade air fryer chicken tenders feature a crispy, golden coating and juicy chicken cooked without deep frying.
Made with fresh chicken tenderloins, seasoned flour, and a simple egg wash, this easy recipe delivers a satisfying meal in approximately 25 minutes.
Cooking the tenders at 400°F (200°C) helps create a crunchy exterior while keeping the inside tender and moist. Serve them with your favorite dipping sauces, fresh vegetables, or potato wedges for a family-friendly lunch or dinner.
Recipe Overview
- Preparation Time: 10 minutes
- Cooking Time: 15 minutes
- Total Time: 25 minutes
- Servings: 6
- Cooking Temperature: 400°F (200°C)
- Cooking Method: Air frying
Ingredients for Air Fryer Chicken Tenders
The recipe uses everyday pantry ingredients and a handful of seasonings to create a flavorful coating. Prepare the ingredients before starting so the chicken can be breaded efficiently.
Main Ingredients
- 1.5 pounds chicken tenderloins: Fresh, evenly sized pieces cook more consistently and remain juicy.
- 1 cup all-purpose flour: Creates the foundation of the crispy outer coating.
- 1 large egg: Acts as a binder, helping the seasoned flour adhere to the chicken.
- 1 tablespoon paprika: Adds a mild peppery flavor and warm color.
- 1 tablespoon dried parsley flakes: Provides a subtle herbal taste.
- 1 teaspoon seasoned salt: Enhances the overall savory flavor.
- ½ teaspoon ground black pepper: Adds a gentle peppery kick.
- Cooking spray: Helps the coating brown and prevents sticking.
Avocado oil spray is another suitable option because it can withstand the high cooking temperature.
How to Make Air Fryer Chicken Tenders
Step 1: Prepare the Chicken and Seasoned Flour
Preheat the air fryer to 400°F (200°C), following the manufacturer’s instructions. Pat the chicken tenderloins dry with paper towels to remove excess moisture. This helps the coating adhere more effectively.
In a large, shallow bowl, combine the flour, paprika, parsley flakes, seasoned salt, and black pepper. Stir until the seasonings are evenly distributed throughout the flour.
In a separate bowl, beat the egg thoroughly until the yolk and white are fully combined.
Step 2: Coat the Chicken
Dip each tenderloin into the seasoned flour, turning it to cover all sides. Shake off any excess, then transfer the chicken to the beaten egg. Turn the piece until it is completely coated.
Return the egg-coated tenderloin to the flour mixture, pressing gently to create an even outer layer. Shake off loose flour and set the breaded chicken aside on a clean plate or tray.
Repeat the process with the remaining tenderloins. Avoid leaving thick clumps of flour on the surface, as they may remain powdery after cooking.
Step 3: Arrange the Chicken in the Air Fryer
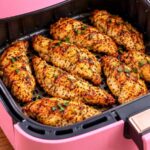
Lightly spray the air fryer basket with cooking spray to help prevent sticking. Arrange the breaded tenderloins in a single layer, leaving space between each piece so hot air can circulate.
Lightly mist the tops of the chicken with cooking spray. This step is important for helping the flour coating turn golden and crisp rather than remaining dry and white.
If the basket cannot accommodate all the tenderloins comfortably, cook them in separate batches.
Step 4: Air Fry Until Golden and Cooked Through
Place the basket in the preheated air fryer and cook the chicken for 8 minutes. Carefully open the basket and turn each tenderloin over using tongs.
Lightly spray the exposed surfaces with cooking spray, then return the basket to the air fryer. Continue cooking for another 7 to 8 minutes, checking the chicken toward the end of the cooking period.
Cooking times can vary depending on the thickness of the tenderloins and the air fryer model. Insert an instant-read thermometer into the thickest part of a tenderloin. The chicken is ready when it reaches an internal temperature of 165°F (74°C).
Transfer the cooked tenders to a serving plate and allow them to rest briefly before serving.
Expert Tips for Crispy, Juicy Chicken
- Dry the chicken first: Removing excess moisture helps the flour coating stick and reduces the chance of a soggy exterior.
- Mist the flour coating thoroughly: Apply a light, even layer of cooking spray to any exposed flour. This helps prevent pale, dusty patches.
- Avoid overcrowding: Leave sufficient room around each piece to allow the hot air to circulate. Overcrowding can lead to uneven browning.
- Check doneness early: Begin checking the internal temperature after approximately 12 minutes, especially if your tenderloins are thin. Remove them as soon as they reach 165°F (74°C).
- Keep cooked batches warm: If preparing several batches, place finished tenders on a wire rack in a 200°F (95°C) oven while the remaining chicken cooks. Avoid stacking them, which can soften the crust.
- Use a light hand with oil: A thin mist is enough to help the coating brown. Excessive oil is unnecessary and may affect the final texture.
Seasoning Variations and Crunchy Coating Options
You can easily adjust the flavor of the seasoned flour to suit your preferences. Add garlic powder or onion powder for a deeper savory taste, or include a pinch of cayenne pepper if you enjoy a little heat.
For a crunchier crust, replace the second flour coating with panko breadcrumbs or finely crushed cornflakes.
After dipping the chicken in the egg, press it into the alternative coating until the surface is evenly covered. Mist the breaded pieces with cooking spray before air frying.
For a different preparation method, marinate or brine the chicken before breading. Pat the tenderloins dry afterward so the coating can adhere properly.
Keep the cooking temperature and internal doneness requirement the same, adjusting the cooking time as needed for the thickness of the chicken.
Serving Suggestions
Freshly cooked chicken tenders pair well with a variety of dipping sauces and side dishes. Serve them with ranch dressing, honey mustard, barbecue sauce, or sweet chili sauce for a classic meal.
For a simple dinner, pair the tenders with roasted vegetables, steamed broccoli, or crispy potato wedges. They also work well sliced over a garden salad or tucked into warm flatbreads with lettuce and a favorite dressing.
For a family-style meal, arrange the chicken on a large serving platter with several dipping sauces on the side. Serve immediately while the coating is still crisp.
Nutrition Facts
The following values are estimates per serving, based on six servings. Actual nutrition may vary depending on the size of the chicken pieces, how much flour adheres to the meat, and the amount of cooking spray used.
| Nutrient | Amount per Serving | % Daily Value |
|---|---|---|
| Calories | 279 | — |
| Total Fat | 5 g | 7% |
| Saturated Fat | 1 g | 7% |
| Cholesterol | 127 mg | 42% |
| Sodium | 351 mg | 15% |
| Total Carbohydrates | 17 g | 6% |
| Dietary Fiber | 1 g | 4% |
| Total Sugars | 0 g | — |
| Protein | 39 g | 77% |
| Vitamin C | 1 mg | 1% |
| Calcium | 31 mg | 2% |
| Iron | 3 mg | 15% |
| Potassium | 358 mg | 8% |
Daily Values are based on a standard 2,000-calorie diet. These figures are provided as a general nutritional guide.