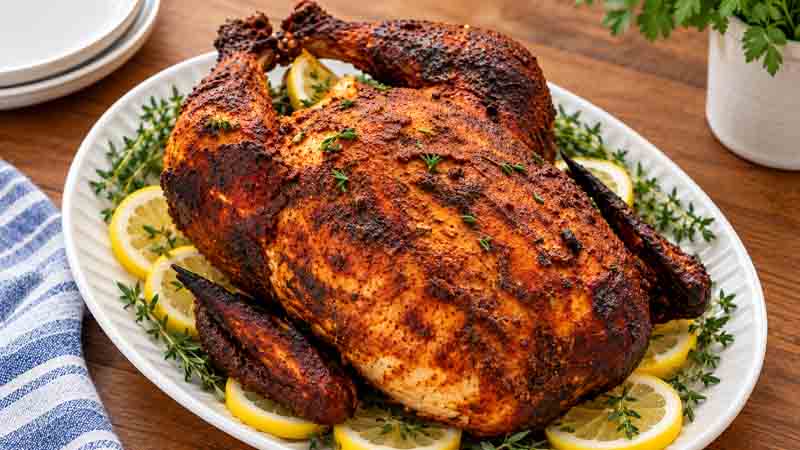
Relive the legendary flavor of the 1990s with this classic copycat Kenny Rogers Roasters rotisserie chicken recipe.
Renowned for its tender texture and lingering citrus-smokiness, this home-cooked version reproduces the exact rotisserie style that made the restaurant chain famous.
Achieving restaurant-grade succulence requires a precise technique built around three foundational pillars: a moisture-locking salt dry brine, a rich citrus-soy marinade, and a fragrant heritage dry rub.
3 Secret Steps to Perfect Rotisserie-Style Chicken
Recreating this iconic dish at home relies on combining three distinct culinary steps in sequential order:
- The Dry Salt Brine: Draws out surface moisture and locks structural juices deep inside the meat.
- The Citrus-Soy Marinade: Infuses intense tang, subtle sweetness, and authentic wood-fire depth throughout the bird.
- The Heritage Dry Rub: Creates an aromatic crust that caramelizes into a sticky, bold-flavored skin during baking.
Recipe Preparation and Cooking Times
Planning ahead is critical when preparing this recipe because low-and-slow roasting delivers maximum tenderness.
- Prep Time: 30 minutes
- Marinating Time: 8 to 24 hours
- Cook Time: 4 hours
- Total Time: 8 hours 30 minutes to 24 hours 30 minutes
- Servings: 4 portions
Complete Ingredients List
Gather these exact ingredients to recreate the exact heritage flavor profile.
For the Chicken & Salt Brine
- Whole Chicken: 1 whole bird (approximately 4 lbs)
- Coarse Salt: ½ cup rock salt or sea salt
For the Citrus-Soy Marinade
- Soy Sauce: ¼ cup soy sauce or tamari
- Citrus Juice: ¼ cup fresh lime juice (or fresh lemon juice)
- Oil Base: ¼ cup peanut oil or olive oil
- Sweetener: 1 tbsp honey or brown sugar
- Tomato Paste: 1 tbsp tomato paste or ketchup
- Liquid Smoke: ¼ tsp liquid smoke (essential for authentic rotisserie depth)
- Mustard: ¼ tsp mustard powder or Dijon mustard
For the Heritage Dry Rub
- Salt: 1 tbsp kosher salt
- Smoked Paprika: 2 tsp smoked paprika
- Garlic Powder: 1 tsp garlic powder
- Onion Powder: 1 tsp onion powder
- Dried Thyme: 1 tsp dried thyme leaves
- Black Pepper: ½ tsp black pepper
- White Pepper: ¼ tsp white pepper
- Cayenne Pepper: ¼ tsp cayenne pepper (adds a slight touch of warmth)
Step-by-Step Cooking Instructions
Follow these detailed step-by-step instructions carefully to achieve the perfect balance of juicy meat and crispy skin.
Step 1: The Quick Salt Brine
The quick salt brine is the ultimate technique for guaranteed juiciness.
- Thoroughly coat the entire exterior of the chicken with the ½ cup of rock salt, rubbing the salt directly into the skin.
- Let the salted chicken sit uncovered at room temperature for exactly 20 minutes.
- Rinse every trace of salt off the chicken using cold running water.
- Pat the chicken completely dry inside and out using paper towels.
Step 2: Overnight Citrus-Soy Marinating
Marinating allows the acid, oil, and liquid smoke to deeply penetrate the meat fibers.
- In a medium mixing bowl, whisk together the soy sauce, lime juice, peanut oil, honey, tomato paste, liquid smoke, and mustard powder until blended.
- Place the dry chicken into a heavy-duty gallon Ziploc bag.
- Pour the citrus-soy marinade into the bag directly over the chicken.
- Seal the bag securely, massaging the liquid into the skin and cavity.
- Transfer the bag to the refrigerator and marinate for at least 8 hours, ideally up to 24 hours for maximum depth.
Step 3: Preparing the Heritage Dry Rub
Applying the dry seasoning layer right before roasting ensures a crisp texture.
- Take the marinated chicken out of the refrigerator 20 minutes prior to cooking to take off the chill.
- Preheat your kitchen oven to 275°F (135°C).
- In a small bowl, thoroughly mix the kosher salt, smoked paprika, garlic powder, onion powder, dried thyme, black pepper, white pepper, and cayenne pepper.
- Remove the chicken from the bag, but do not throw away the remaining marinade. Pour the excess marinade into a small bowl to save for hourly basting.
- Rub the dry rub spice mixture firmly over all surfaces of the chicken skin.
- Position the seasoned bird breast-side up in a roasting pan.
Step 4: Low-and-Slow Oven Roasting
Gentle heat breaks down connective tissue over four hours, resulting in fall-off-the-bone meat.
- Place the roasting pan in the preheated oven and roast uncovered at 275°F (135°C) for 4 hours total.
- Baste the bird generously with the saved marinade once every hour during the first 3 hours of baking.
- During the final hour of roasting, baste the bird every 15 minutes to construct a rich, caramelized, sticky exterior.
- Remove the chicken from the oven and let it rest undisturbed for 15 to 20 minutes before carving so the juices redistribute evenly throughout the meat.
Iconic Restaurant Side Dish Pairings
Complete your nostalgic 90s dinner table by serving this roasted chicken alongside classic home-style side dishes:
- Home-Style Sweet Corn Muffins: Moist, cake-like corn muffins that provide a sweet balance to the savory chicken.
- Creamy Gravy Mashed Potatoes: Fluffy whipped potatoes topped with rich poultry gravy.
- Garlic Butter Corn & Carrots: Steamed sweet corn and carrots tossed in garlic butter sauce.
- Creamy Macaroni and Cheese: Rich, velvety baked macaroni and cheese.
Essential Pro Tips for Success
- Do Not Skip the Resting Period: Carving the chicken immediately after taking it out of the oven will cause natural juices to spill out onto the cutting board. Resting for 15 to 20 minutes keeps every bite tender.
- Maintain the Basting Schedule: Increasing the basting frequency to every 15 minutes during the final hour creates that signature sticky skin coating.
- Adjusting Smoke Flavor: Liquid smoke is essential to mimic the original wood-fire rotisserie ovens used in restaurants.